Now, I know I created a reference folder for this project, but since then I have a new computer and I can't find it for the life of me. On the other hand I found a blog post I wish I had found in 2018, basing a skirt a bit more in the earlier style of on a
Dutch example. There are some good references there which I can take absolutely no credit for, so follow the link, please!
The fabric I had at hand (also used for the
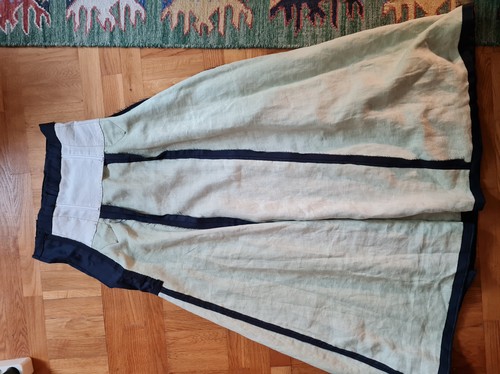
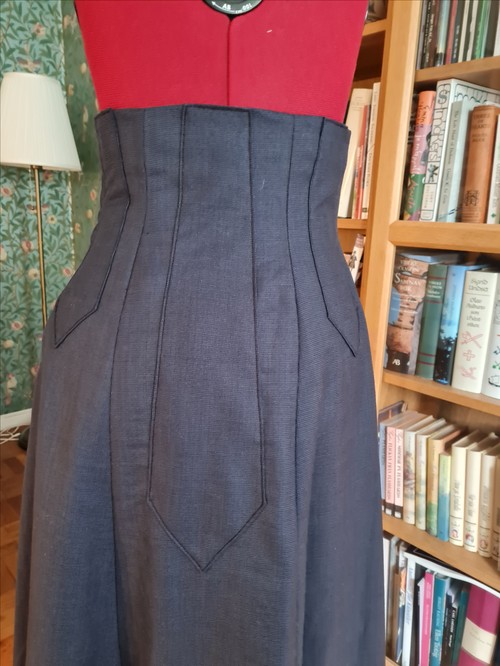
Victorian project which turned into another UFO) was a bit flimsy so at the time I decided to flatline it with linen to give it a bit of body. Normally I don't really line skirts anymore. The linen is NOT meant to ever be seen, as it's dyed and then sun-bleached. In the end I ended up with a six gore skirt with a side closure - which is probably not really correct, I think most skirts are either front side closed (like the one above, I guess) and closed in the back, but I didn't have enough fabric to hide a front side closure cleverly as I recall. Awh well, you can probably see where I am going with this: long story short, the skirt ended up somewhere between the ten-gore Victorian ones and the elegant, hobble like varieties of the 19-teens.
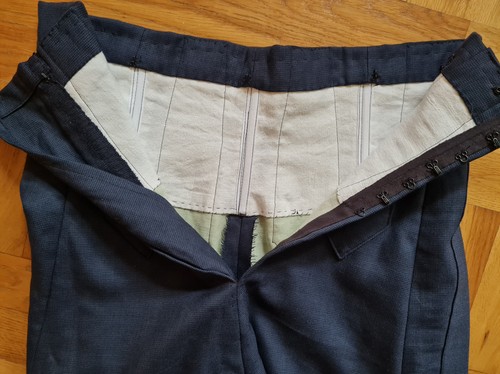
For the raised waist, my solution is almost exactly the same as the one in the Dutch magazine in the link above - an extra strip of fabric with inserted boning (plastic, in this case). Spring steel or synthetic whalebone would be better.
So far so good. I finished the skirt, wore it to the event with a matching bodice creating the illusion of a dress, came home and put it away.
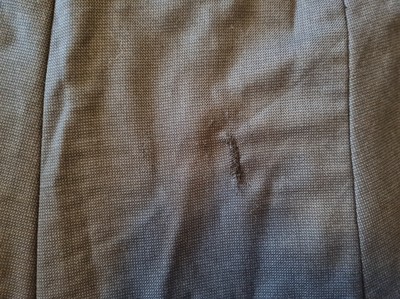
Fast forward to to November 2021, when I dug it out for an event. When trying to get the wrinkles out, I found a Very Annoying Tear in it. No idea how it happen, no idea why, but it was placed almost in the middle of the back panel, somewhere along lower bum height - so no forgiving skirt folds to hide it either! After a few futile tries, I realised that with the tiny tiny black and blue check/dogstooth check pattern on the skirt no thread and/or patch would match well enough for a discreet mend (again, had the tear been further down I'd gone for a patch anyway), so I did a "don't tear any further please" mend in a hurry and said not very nice words while doing it.
The clumsy mending.
I was not at all happy about having spent hours and hours on a skirt that I really like and that really fits me just to throw it out because of a tear, though, so I kept thinking. Replacing part of the panel? A patch after all?
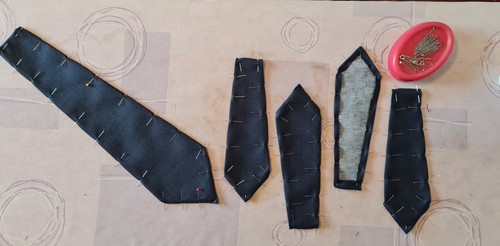
In the end, I decided to stray from the straight and narrow and add a decorative patch on top to reinforce it AND hide the mending. A clever friend suggested adding a few other patches to make it look more intentional and after freaking out a bit about adding things that needed to be properly aligned on an already finished garment, I set to work. I first tried out what the patches could look like, starting with the big one in the middle. The tear is right under the widest part of that one, so that would decide the proportions of evertything:
The final idea, after some tweaking of sizes and shapes.
At this point, I was totally out of references for the look other than "it will hide the patch and (hopefully) not look terribly out of place from a distance" so I could just as well use interfacing to help myself out getting the patches neat.
As you can see, I was trying to use the small scraps I had cleverly. After all, who knows what I need to fix next time...?
Patches interfaced, cut and ironed.
And then machine-sewn along the edges.
To my enormous surprise I could actually make the skirt wriggle through the sewing machine, so that I could attach the patches by following the same sewing lines ones more. I was prepared to do it by hand, but this saved time. I think that time-wise this is right at the point where machine sewing is a possibility for a garment not made at home, but I think hand sewing would technically have been more accurate. Then again, since the patches sort of killed any ambitions for 100% historical accuracy anyway... And you know what? I really liked the result. The photo emphasises some unevenness-es not quite as visible IRL, and it looks, if not historically accurate, at least intentional.
The skirt from the back.
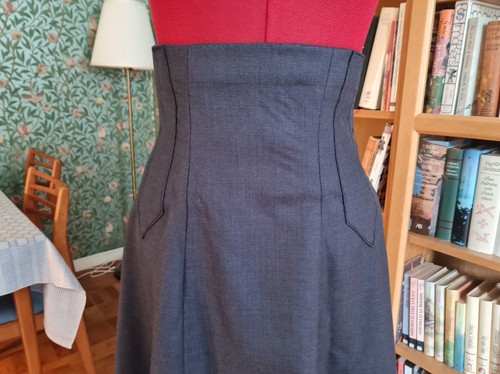
And from the front. The patches added ONLY to make it look like I had a plan...
Full length picture to show the proportions.
To conclude: as far as I know, there is no early 20th century skirt with both the high, sleek waistline and added decorations of this type, BUT it saved me from throwing out a lot of work and it prolonged the life of a garment, at that is at least historically accurate.
The facts (for the Historic Sew Monthly)
What it is: An early 20th century skirt
Challenge: 2022:1, Anniversary (Re-do, re-make, re-fashion and/or The UFO Challenge from 2013). How it fits: I had to mend the skirt, getting a bit creative in the process. I put of mending it forever...
Material: Wool(mix), linen, cotton.
Pattern: My own fusion construction
Year: 1901-1909-ish
Notions: Cotton twill tape, hooks and eyes, snap buttons, a bit of interfacing, plastic boning, polyester thread
How historically accurate is it: 40% tops (shape ok, materials semi ok, design choices not so much)
Time: About 20-30 hours for the initial skirt including constructing a pattern etc. About six hours to construct and add the patches.
Cost: About 40 euros, counting the original cost of the fabric, notions and all.
First worn: The original skirt was first worn in January 2019, the re-made skirt is not yet worn but will be in October (mumble grumble plague willing etc).