Foundations: A red petticoat
Kategori: , Allmänt
This year Historic Sew Fortnightly turned into Historic Sew Monthly, which will be much more realistic for me (and hopefully less stressful for the very nice people who try to keep it all together!). The first challenge is foundations. As Leimomi pointed out, "foundations" doesn't necessarily mean undergarments, but as I originally planned to make a new chemise and ended up making a petticoat, I can only admit that I am with the overwhelming majority in how I interpreted this challenge.
The issue of petticoats does at times confuse me, mostly because I move a lot between different periods and/or geographical areas. Smock/chemise - kirtle/gamurra - gown/zimarra? Smock-petticoat-kirtle-gown? What's actually right for what period? It's a bit like the stays/bodies/corset question - not likely to be settled anytime soon, at least not in my brain.
However, I quite like to have something under the kirtle if I'm not wearing a gown, at least for upper class stuff, so I've been looking for a better petticoat for a while. Might not always use it, but still. And as I wasn't finding any nice linen fabric for a new chemise, I started to look for other options. I found 5,5 metres of polyester...uhm... taffeta-ish fabric on a clearance sale, and that settled it: this was the perfect opportunity to try out petticoats without spending scary amounts of money - since I'm really trying to work myself through the stash this year as well. That the fabric was red wasn't bad either; apparently, at least in a Tudor context, red's the petticoat colour nr 1.
With 5,5 metres of fabric I could even try to make two petticoats. To cut two bodices at the same time minimized the amount of leftover fabric, too, and made planning simpler. One's still in pieces in my stash, while I started with the U-front one I thought might be the most versatile variety, even for someone who's not (yet) doing Tudor.

I started by scaling up the pattern from Tudor tailor. I wonder why I haven't thought of doing it on A3 paper before - the edges of the paper (straight, and at 90 degrees angle to each other at all times) helped a lot, actually.
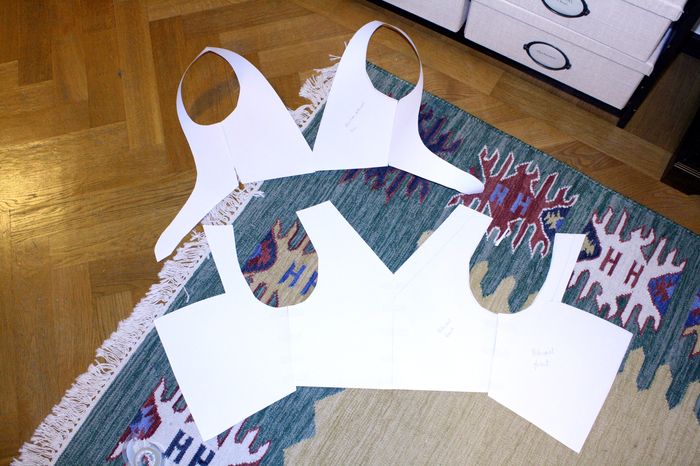
The finished bodice patterns. The top one is for the U-front bodice, the other one for a later project.
I then tried out the paper pattern as best I could, making basic adjustments. I didn't make a mock-up, since this fabric is soooo much not HA that the whole project is basically a mock-up in itself, instead I cut the outer fabric, made some more adjustments and then cut the lining pieces from the top fabric pieces.
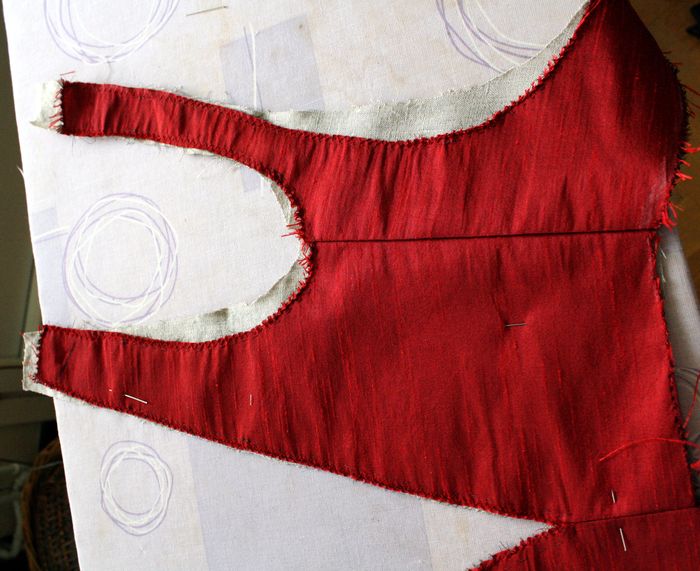
"Cut the lining pieces from the top fabric pieces?!" I hear you cry. Well, yes. This is how sloppy my work is. Really. I joined the top fabric pieces, joined the lining pieces, pressed the seams, and then cut the outer edges to match the top fabric and basted the layers together. If done properly, I'd have joined the shoulder seams of each layer before basting, but I find that the later I close the shoulder seams, the less cursing there will be. I much rather adjust the shoulder seams with both top fabric and lining affecting the drape of the fabric and fit of the pattern.

There was also fabric enough for bias tape for binding the outer edges. This is my first pile of bias strips. Lovely, apart from the fact they are half as wide as they ought to be. I didn't think, and had to start over. It then took embarassingly long for me to figure out how to join them, as well. My brain works, or doesn't, in mysterious ways.

Really bad photo of the inside of the bodice, with bias binding in place. The skirt isn't lined, since this is only cheat-t Tudor (there ought to be lining, and possibly interlining. With a lined kirtle and a lined gown, that would be at least six, likely seven layers of fabric in the skirt section of an outfit. S e v e n. Plus shift. O dear).
I pleated the skirt, attached it to the top fabric and covered all raw edges with the bodice lining. To only have to work four eyelets in not too many layers of fabric was awesome. I'll pay for it next month.

The finished petticoat. The stiffness of the fabric makes the folds look a bit wierd, but it doesn't really matter with a kirtle on top of it, I think.
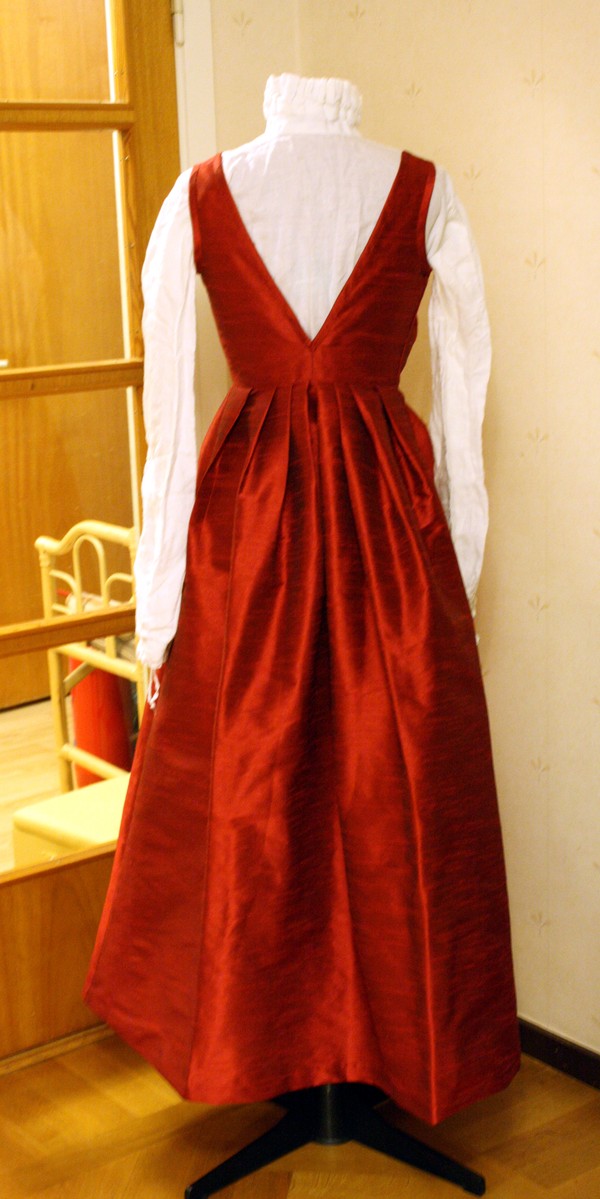
And the back.
This was a test project in a lot of ways. The armholes are perhaps a bit too small, which means that the petticoat will show through the armhole of the kirtle if the sleeves are not attached (and I don't have many kirtles/dresses with attached sleeves). Depending on the cut of the neckline, it might also show there, despite the shoulder-straps being narrow. Might be a problem and might not be. The shoulders are, of course, prone to slide a bit, but not as bad as feared. Anyway, for a mock-up, I'm pleased.
The Challenge: 2015-1, Foundations
Fabric: Polyester taffetasomething
Pattern: from The Tudor Tailor
Year: First half of the 16th century
Notions: Polyester thread (due to machine sewing) linen for lining
How historically accurate is it? Model: yes, apart from it not being lined. Materials: No. Machine-sewn, apart from bias binding and hem, which was done by hand. Which is silly on a polyester garment, I know. Can't help myself...
Hours to complete: Didn't count, didn't concentrate too well. Maybe 10-12
First worn: Not yet
Total cost: About 15 euros.

